Do the reverse engineering from a data source
In this section, you can find how to do reverse engineer from a data source to create a technical model. Reverse engineering is the process of reconstructing a physical and/or Entity Relationship (ER) model from an existing data source. The purpose of reverse engineering is to avoid manual work as much as possible. It is important that the technical interface with which the data provided delivers the data is in accordance with the technical specification.
Before you begin, make sure that you have an active connection to the source database that you want to do the reverse engineer.
To do the reverse engineer:
- In the empty technical model, select
Database > Update Model from Database.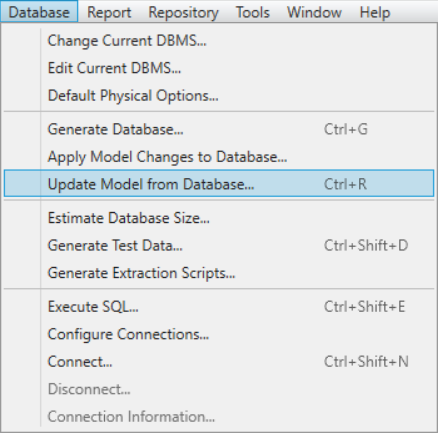
Update model from database - The Database Reverse Engineering Options dialog box appears. Select
Using a data source. If the data source is correct, go to step 7. If it is not correct, go to step 3.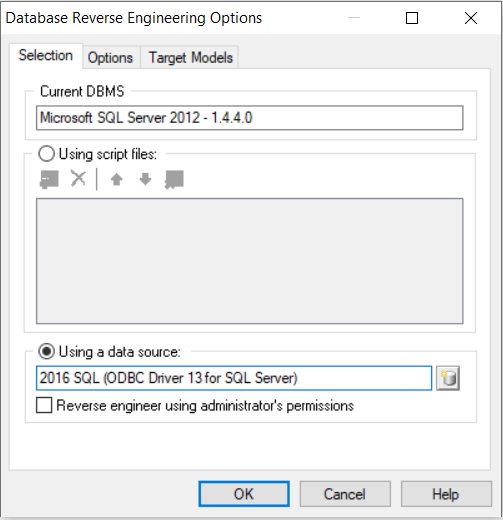
Database Reverse Engineering Options - If the data source is not correct, you click on the
Connect to data sourceicon. - In the Connect to a Data Source dialog box, click on
Configure.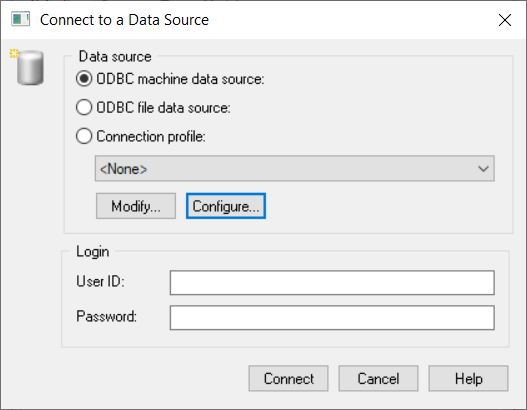
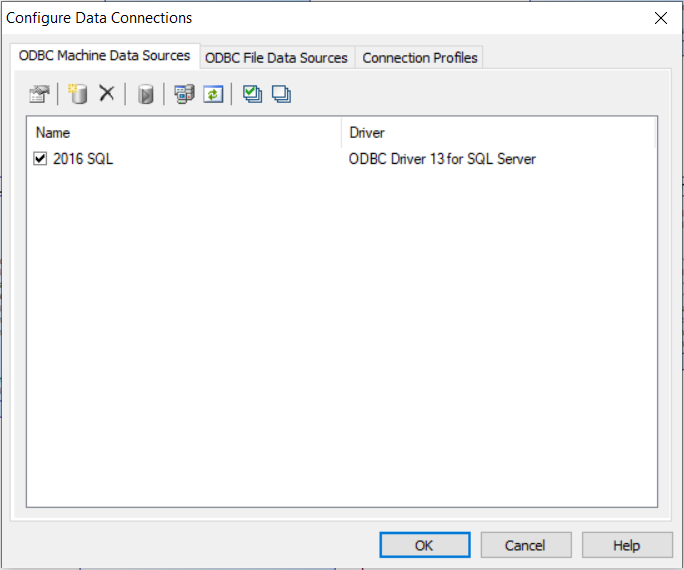
Connect to a data source - In the Configure Data Connections dialog box, put a check next to the data source you want to connect with. Click on OK.
Configure data connections - In the Connect to a Data Source dialog box, click on Connect.
- In the Database Reverse Engineering Options dialog box, click on OK.
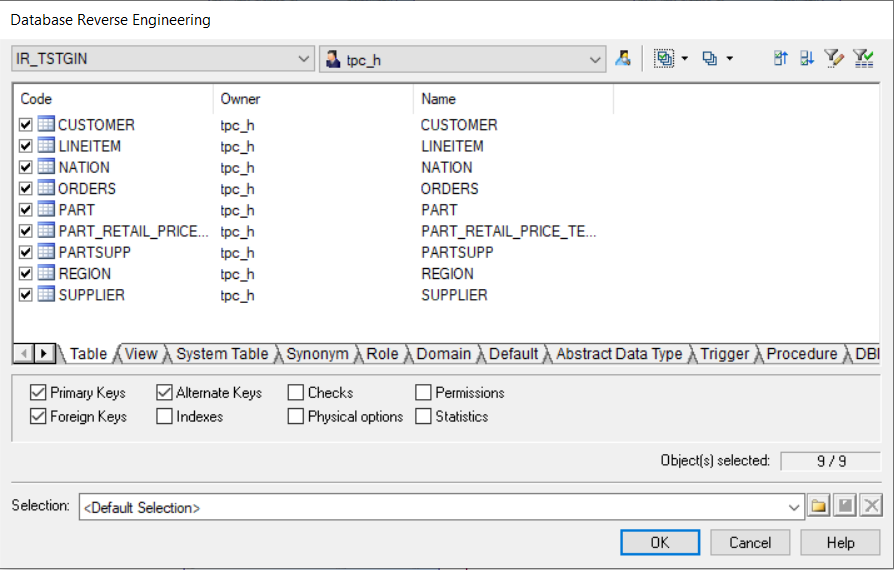
Database Reverse Engineering Options - The Database Reverse Engineering dialog box appears. This dialog box allows you to specify which objects you want to reverse engineer. Select the relevant tables. Make sure you deselect: Indexes, Checks, and Physical options. Click OK to begin reverse engineering
Database Reverse Engineering - The Merge Models dialog box appears. This dialog box allows you to control the merging of the new objects into your existing model. Make sure you uncheck Model Options. Carefully validate if other options must be unchecked as well.
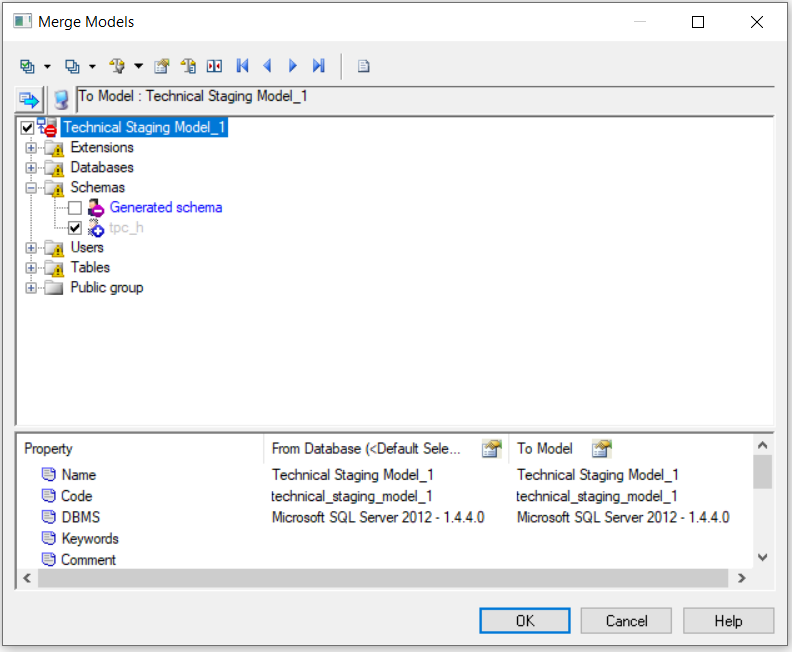
Merge models - You see the physical diagram of the tables selected for re-engineering.
To make sure your model is complete, you have to do some post-processing activities.
Check naming conventions
Make sure to check if the uppercase/lowercase of the names and the codes in PowerDesigner matches the source system. It is a known bug in PowerDesigner when re-engineering models from databases.
To change to uppercase or lowercase:
- Select
Tools > Model Options > Naming conventions > Other objects.
Assign a schema
Make sure the schema is filled. It is a known bug in PowerDesigner that this data gets lost in some cases. You can even “mass change” data of tables in your models.
{info} In PowerDesigner a
schemais sometimes calledowner.
To complete the information about the schema:
- Select
Model > Tables. - Select all tables (click on top of the left corner).
- Click in the column
Owner. - Click on the drop-down menu and set the appropriate owner.

List of tables - Click on OK.
Set a default filegroup
In some databases, the entities of one project has to be in a specific filegroup. In this instruction you will set a default filegroup for a physical data model. You have to set this once for each physical data model.
- Open the physical data model.
- Click on
Database > Default Physical Options.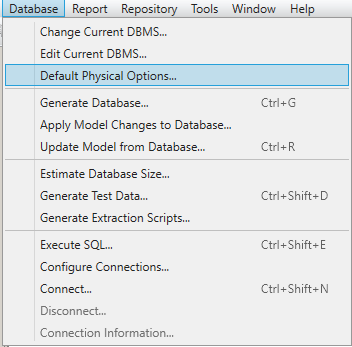
Menu Default Physical Options - The window
Default Physical Optionsappears. The tabTableis open. Click on the plus sign next toon, to expand the tree. The option<filegroup>("DEFAULT")appears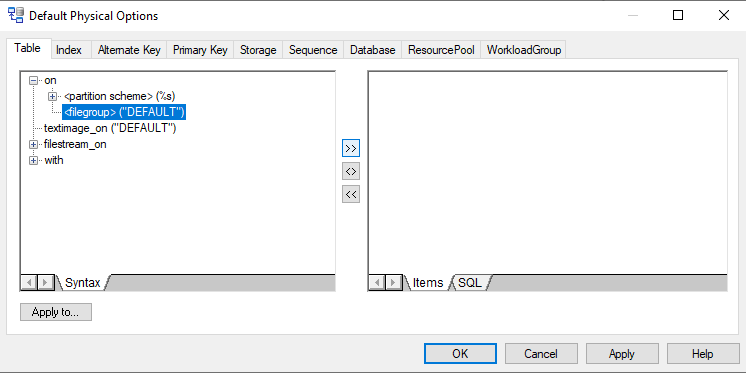
Default Physical options - Select
<filegroup>("DEFAULT")and click on the button with the>>symbol. This will bring the option to the right side of the window. - Select the filegroup and edit the text at the bottom of the window, next to
<filegroup> =. Make sure the text is without quotes. If you put quotes in it, this will lead to three quotes in the script, which lead to an error while running the script.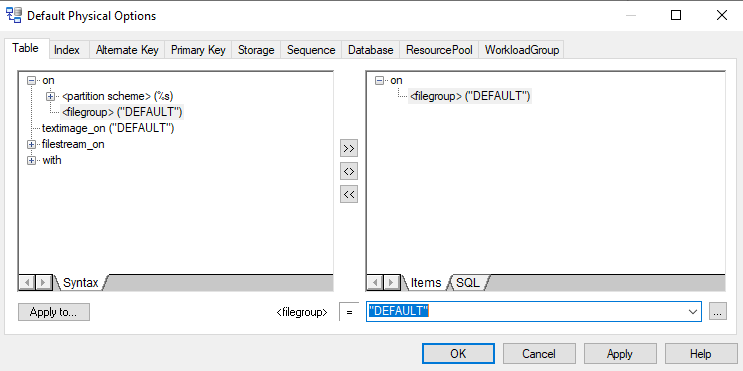
Edit filegroup - In the figure below you see an example where the filegroup is changed to
PRIMARY.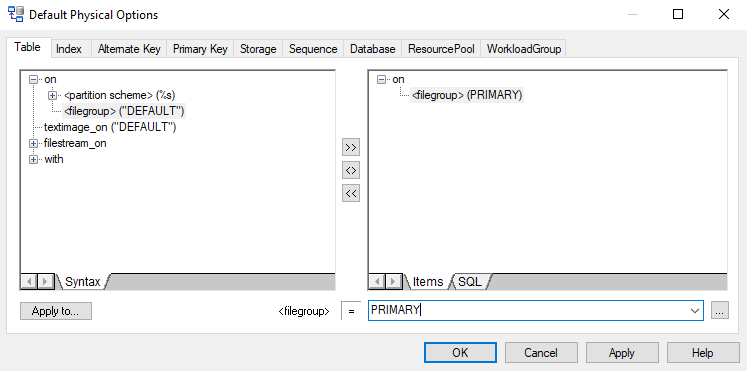
Edit filegroup
{info} The filegroup applies to every new entity you make.
- To apply the settings to existing entities, click on
Apply to. A window appears where you can select the existing entities. Put a checkmark next to the entities you want to apply the setting to, and click onOK.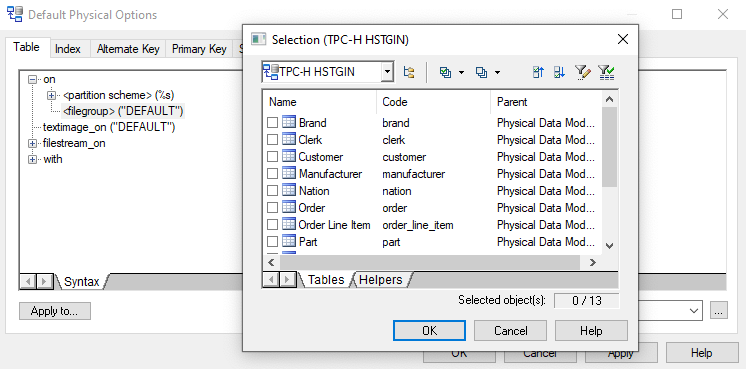
Apply to
Check the script
- To check if the filegroup settings are changed, double click on a table. The window
Table Propertiesappears. - Click on
Previewto check the generated script.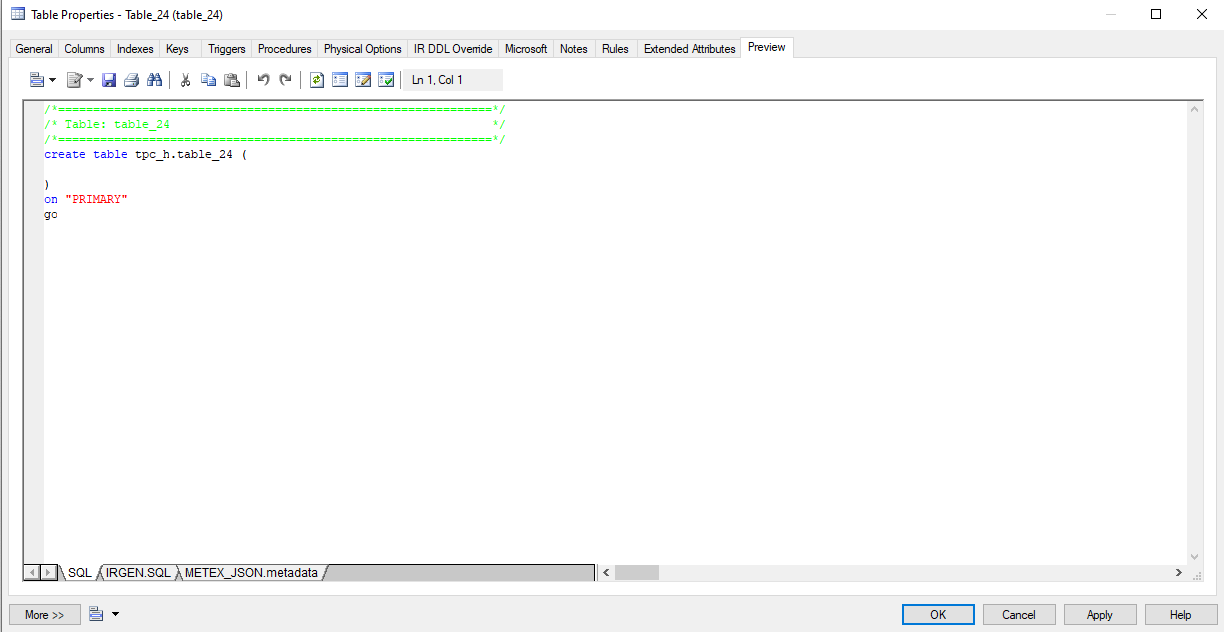
Preview script
Now you have completed the initial set-up of your technical model.